The following steps provide a walk-through to create a project in Visual Studio.NET. Although PowerTCP SSL Sockets for .NET can be used in your preferred environment on any machine that has the .NET Framework installed, the recommended method is to use the Visual Studio .NET environment.
To create a project in Visual Studio .NET, use the following steps:
- Start Visual Studio .NET.
- From the File menu, choose New, and then choose project.
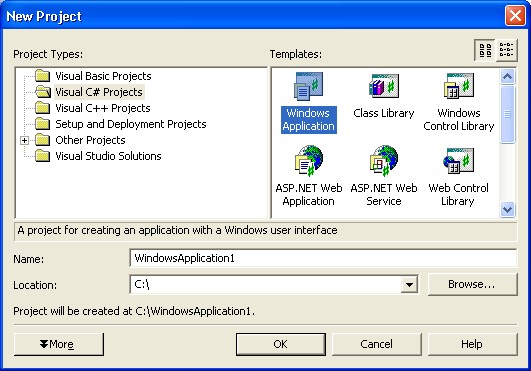
- From the resulting dialog box, choose either Visual C# projects or Visual Basic projects and then choose Windows Application. Alternatively, if you wish to create an ASP.NET web application, you can choose ASP.NET Web Application. Specify a name and a location for the project, and then click OK.
- After these steps have been completed, the project is created.
In This Section
- Creating a Project
- This topic demonstrates how to create a new Windows project in Visual Studio .NET.
- Placing Components on a Form
- This topic demonstrates how to create and use a control using Visual Studio .NET.
- Creating Components Dynamically
- This topic demonstrates how to add a component as a reference using Visual Studio .NET.
- Creating Custom Dlls
- Discusses the steps required when creating a dll that uses a PowerTCP control.
- Using Components Outside of Visual Studio
- This topic discusses the use of the components without Visual Studio.
- Using Events within the Visual Studio .NET Environment
- Describes how to use PowerTCP events within the Visual Studio .NET environment.
- Using Events when a Component is Created Dynamically
- Describes the extra steps required to use events when using a PowerTCP component as a reference.
Send comments on this topic.
Documentation version 1.1.2.0.
© 2008 Dart Communications. All rights reserved.