PowerWEB LiveControls for ASP.NET is a powerful suite of controls designed to enable web applications that can update their data from the server without refreshing the browser. This topic and associated sub-topics are mostly prerequisite to the usage of PowerWEB LiveControls for ASP.NET. For example, this topic illustrates such things as basic usage within Visual Studio.NET. If you are already familiar with these tasks, you may benefit more by examining other topics.
Although PowerWEB LiveControls for ASP.NET can be used in your preferred environment on any machine that has the .NET Framework installed, the recommended method is to use the Visual Studio .NET environment.
NOTE If you copy and paste a LiveControl from one form to another in the designer, be sure to add the <%@ Register %> directive to your page.
To add LiveControls to a WebForm within Visual Studio .NET, use the following steps (the following steps demonstrate using the LiveButton and LiveLabel controls ):
- Create a new project.
- Add the a LiveLabel and LiveButton control to the form. To do this, right-click on the ToolBox and choose Customize ToolBox If the ToolBox is not visible, navigate to the View menu and choose ToolBox
From the resulting dialog box, choose the .NET Framework Components tab, and then scroll until you find the LiveButton and LiveLabel controls (see the screen shot below). Check the checkbox next to it and select OK.

- Click the LiveButton control icon on the ToolBox, and "drag" an instance of it onto the design surface that represents a WebForm. Do the same with LiveLabel. The Visual Studio .NET environment will automatically create instances of the controls.
- Make a quick application to test. Just navigate to the Debug menu and choose Start The application will compile and execute. You should see Internet Explorer (or your other browser) launch with the LiveButton control. The LiveLabel will not be visible until it has text.
- Now a LiveButton and a LiveLabel are visible on the Designer as represented below.

- To add code using Code Behind double click the LiveButton to bring up the class representing the WebForm, then enter your code into the LiveButton1_Click event.
The following code demonstrates setting LiveLabel1 to show the current time on the server when a button click occurs.
[C#]
LiveLabel1.Text = System.DateTime.Now.ToString();

[Visual Basic]
LiveLabel1.Text = System.DateTime.Now.ToString()
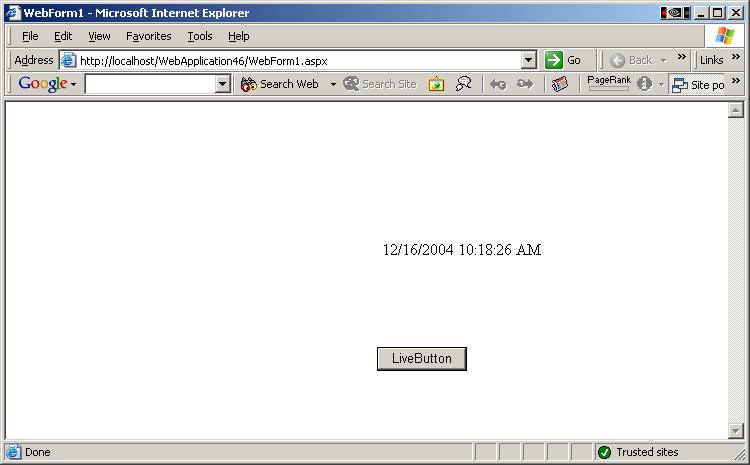
- Compile and run the Web application. You should now have a Web page in Internet Explorer that contains an image of a button. When pressing the button, the current system time should appear as shown below. You will notice that the screen did not refresh when the time appeared. Every time the button is clicked the current time will be displayed.


